
Editing Campaigns
How to open any campaign from the dashboard and change its settings after launch.
Last updated September 1, 2026
How to Edit a Campaign
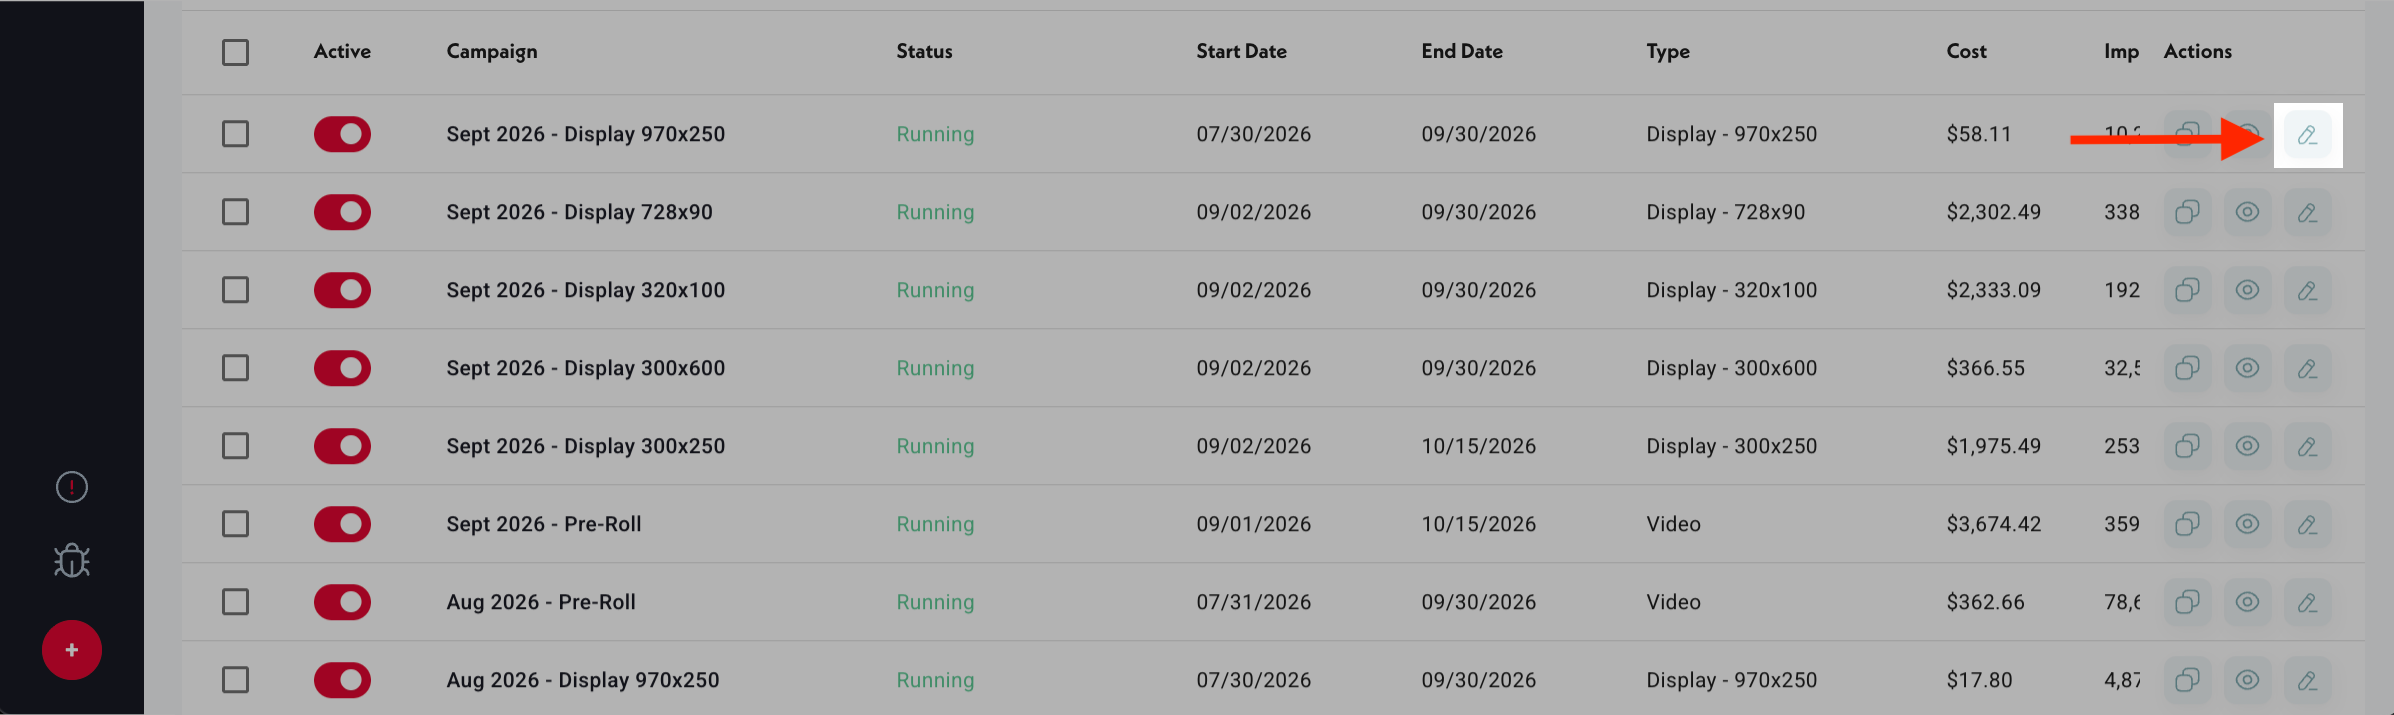
- 1On your dashboard, locate the campaign in the Campaign Chart.
- 2Click the pencil (edit) icon on the far right of the campaign row.
- 3The campaign editor opens. Navigate to any section using the step tabs at the top.
- 4Make your changes.
- 5Click Save to apply them.
What You Can Edit
You can change most settings after launch:
- 1Campaign name and end date.
- 2Day-parting schedule.
- 3Geo targeting, interest targeting, and device targeting.
- 4Creative — add or remove individual ads.
- 5Account budget top-ups.
- 6Goal Auto-Optimization — on/off and goal type.
- 7Total Budget, Maximum Daily Budget, and Pacing (Fast or Even).
- 8Maximum CPM or CPV and Frequency Cap.
Adding Funds While Editing
If your Account Balance is low or depleted, you can add funds directly from the campaign editor's Payment step without leaving the edit flow. See How to Fund Your Account for the full funding walkthrough.
Common Mistakes
- 1Forgetting to click Save — navigating away without saving discards your changes. Always confirm with the Save button at the end of each edit.
- 2Editing the wrong campaign — if you have multiple campaigns with similar names, double-check the campaign name in the editor header before saving. Use Copying Campaigns to create clearly named variants rather than relying on naming conventions after the fact.
- 3Expecting targeting changes to be retroactive — edits to targeting, budget, or creative take effect immediately on future delivery, but do not affect impressions already delivered.
Was this helpful?